🎯 Introduction
Whether you’re editing a professional wedding video, corporate film, or a YouTube vlog, adding clean, well-designed titles is crucial. EDIUS 11 makes this easy through its built-in Quick Titler tool—an efficient and beginner-friendly way to add main titles, subtitles, lower-thirds, and animated text to your projects.
This blog is based on a popular tutorial that walks you through everything from opening Quick Titler to saving, customizing, and applying text overlays.
🛠️ What is Quick Titler in EDIUS?
Quick Titler is a built-in text creation tool in EDIUS that lets users:
-
Add static or animated titles
-
Create lower-thirds, rolling credits, captions
-
Customize fonts, colors, shadows, outlines, and positions
-
Save reusable title templates
It is especially useful because it doesn’t require any external plugins and integrates natively with the EDIUS timeline.
📌 Step-by-Step Guide: Creating Titles Using Quick Titler in EDIUS 11
✅ Step 1: Open Quick Titler
-
In the Bin, right-click inside a folder
-
Click “New Clip” → “Title”
-
This opens the Quick Titler interface
Alternatively, you can press Ctrl + T on your timeline to create a new title at the playhead position.
✍️ Step 2: Add Your Text
-
Click on the “Text Tool” (A icon) in the toolbar
-
Click anywhere on the canvas and type your desired title (e.g., “Wedding Highlights”, “Breaking News”)
-
Resize and reposition your text using handles
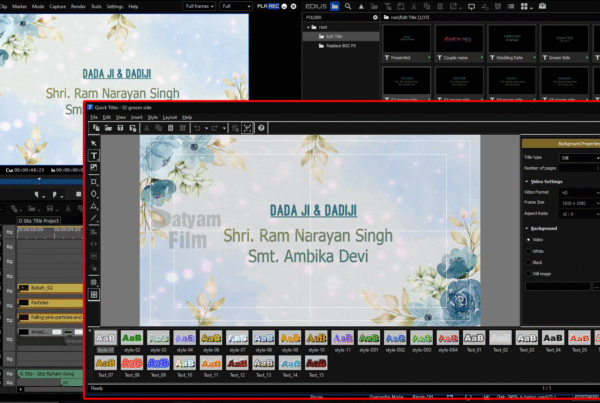
🎨 Step 3: Customize Font and Style
-
Choose your font family (e.g., Roboto, Arial, Times New Roman)
-
Set font size, bold, italic, and alignment
-
Apply outline, shadow, and background box for readability
-
Change the text color and opacity
💡 Tip: For cinematic looks, use semi-transparent background boxes and drop shadows.
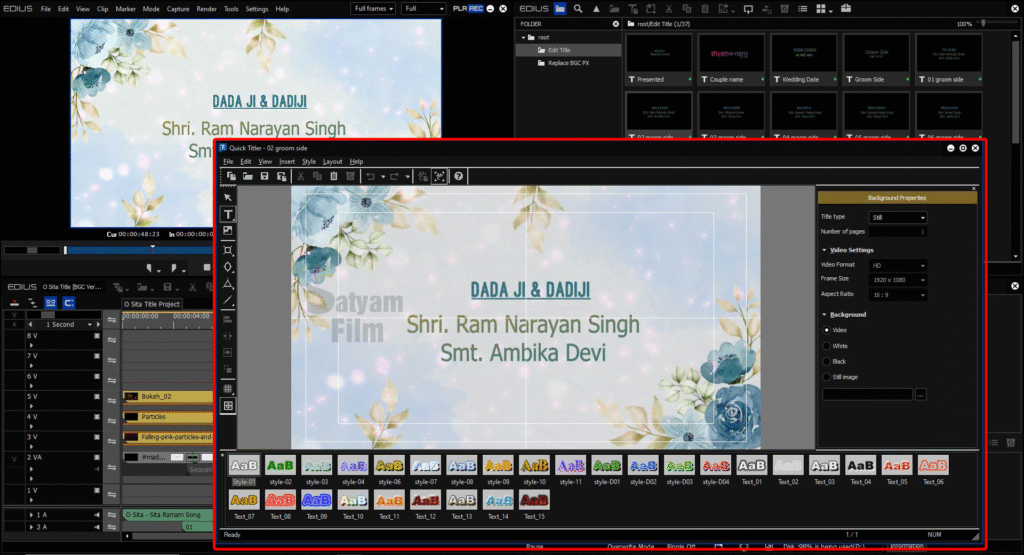
📐 Step 4: Align and Safe Margin Check
-
Use horizontal and vertical guides to align text centrally
-
Enable safe title margins to ensure your text doesn’t get cropped on mobile or TV screens
💾 Step 5: Save and Exit
-
Click File → Save and Exit
-
The title appears in your Bin
-
Drag and drop it onto the timeline (V track)
You can layer it above video, or even animate its entrance using keyframes in the layout editor.
🎞️ Applying Titles in Timeline
-
Place your title above video clips in the V2 or V3 track
-
Extend or trim the title clip duration as needed
-
Use fade-in and fade-out transitions for smooth appearance
-
Optional: Apply motion using the Layouter tool
Title Projects
- Ready to use title projects for wedding ceremony
- In our phoenix pro edius package there are 150+ title projects available.
- Readymade projects needs only to change title, very easy to use
- There are more beautiful
- Projects are full loaded with vfx
- Title projects supported on EDIUS 9, EDIUS 10, EDIUS X, EDIUS 11
- Check out demo our projects package
- Buy now package
🧠 Advanced Tips
| Feature | How It Helps |
|---|---|
| Save as Template | Reuse your branded styles across projects |
| Multiple Text Layers | Add subtitles + header in one design |
| Import Fonts | Use custom fonts for creative titles |
| Rolling Titles | Ideal for end credits—enable from Title properties |
| Static vs Dynamic Text | Choose static for clean overlays, dynamic for animations |
⚠️ Common Mistakes to Avoid
| Mistake | Fix |
|---|---|
| Text is too close to screen edge | Use safe margin guides |
| Titles look blurry on export | Export in full resolution (e.g., 1080p or 4K) |
| Fonts missing in render | Embed or use system fonts |
🧾 Conclusion
Creating professional-looking titles in EDIUS is fast and easy with Quick Titler. Whether you’re designing flashy intros or subtle lower-thirds, the built-in tool gives you all the power you need without complex plugins.
For even better results:
-
Use branding colors and consistent font styles
-
Save reusable templates
-
Test on multiple screen sizes for compatibility
Now you’re ready to turn plain edits into polished productions.
Want to try it; book now edius 11 software available at very best price on www.kartmy.com
Ready to use title projects for edius available in wedding projects dongle at best price check it now